EASTER CHEER
These springtime projects will brighten up your home – they also make gorgeous Easter gifts for family and friends
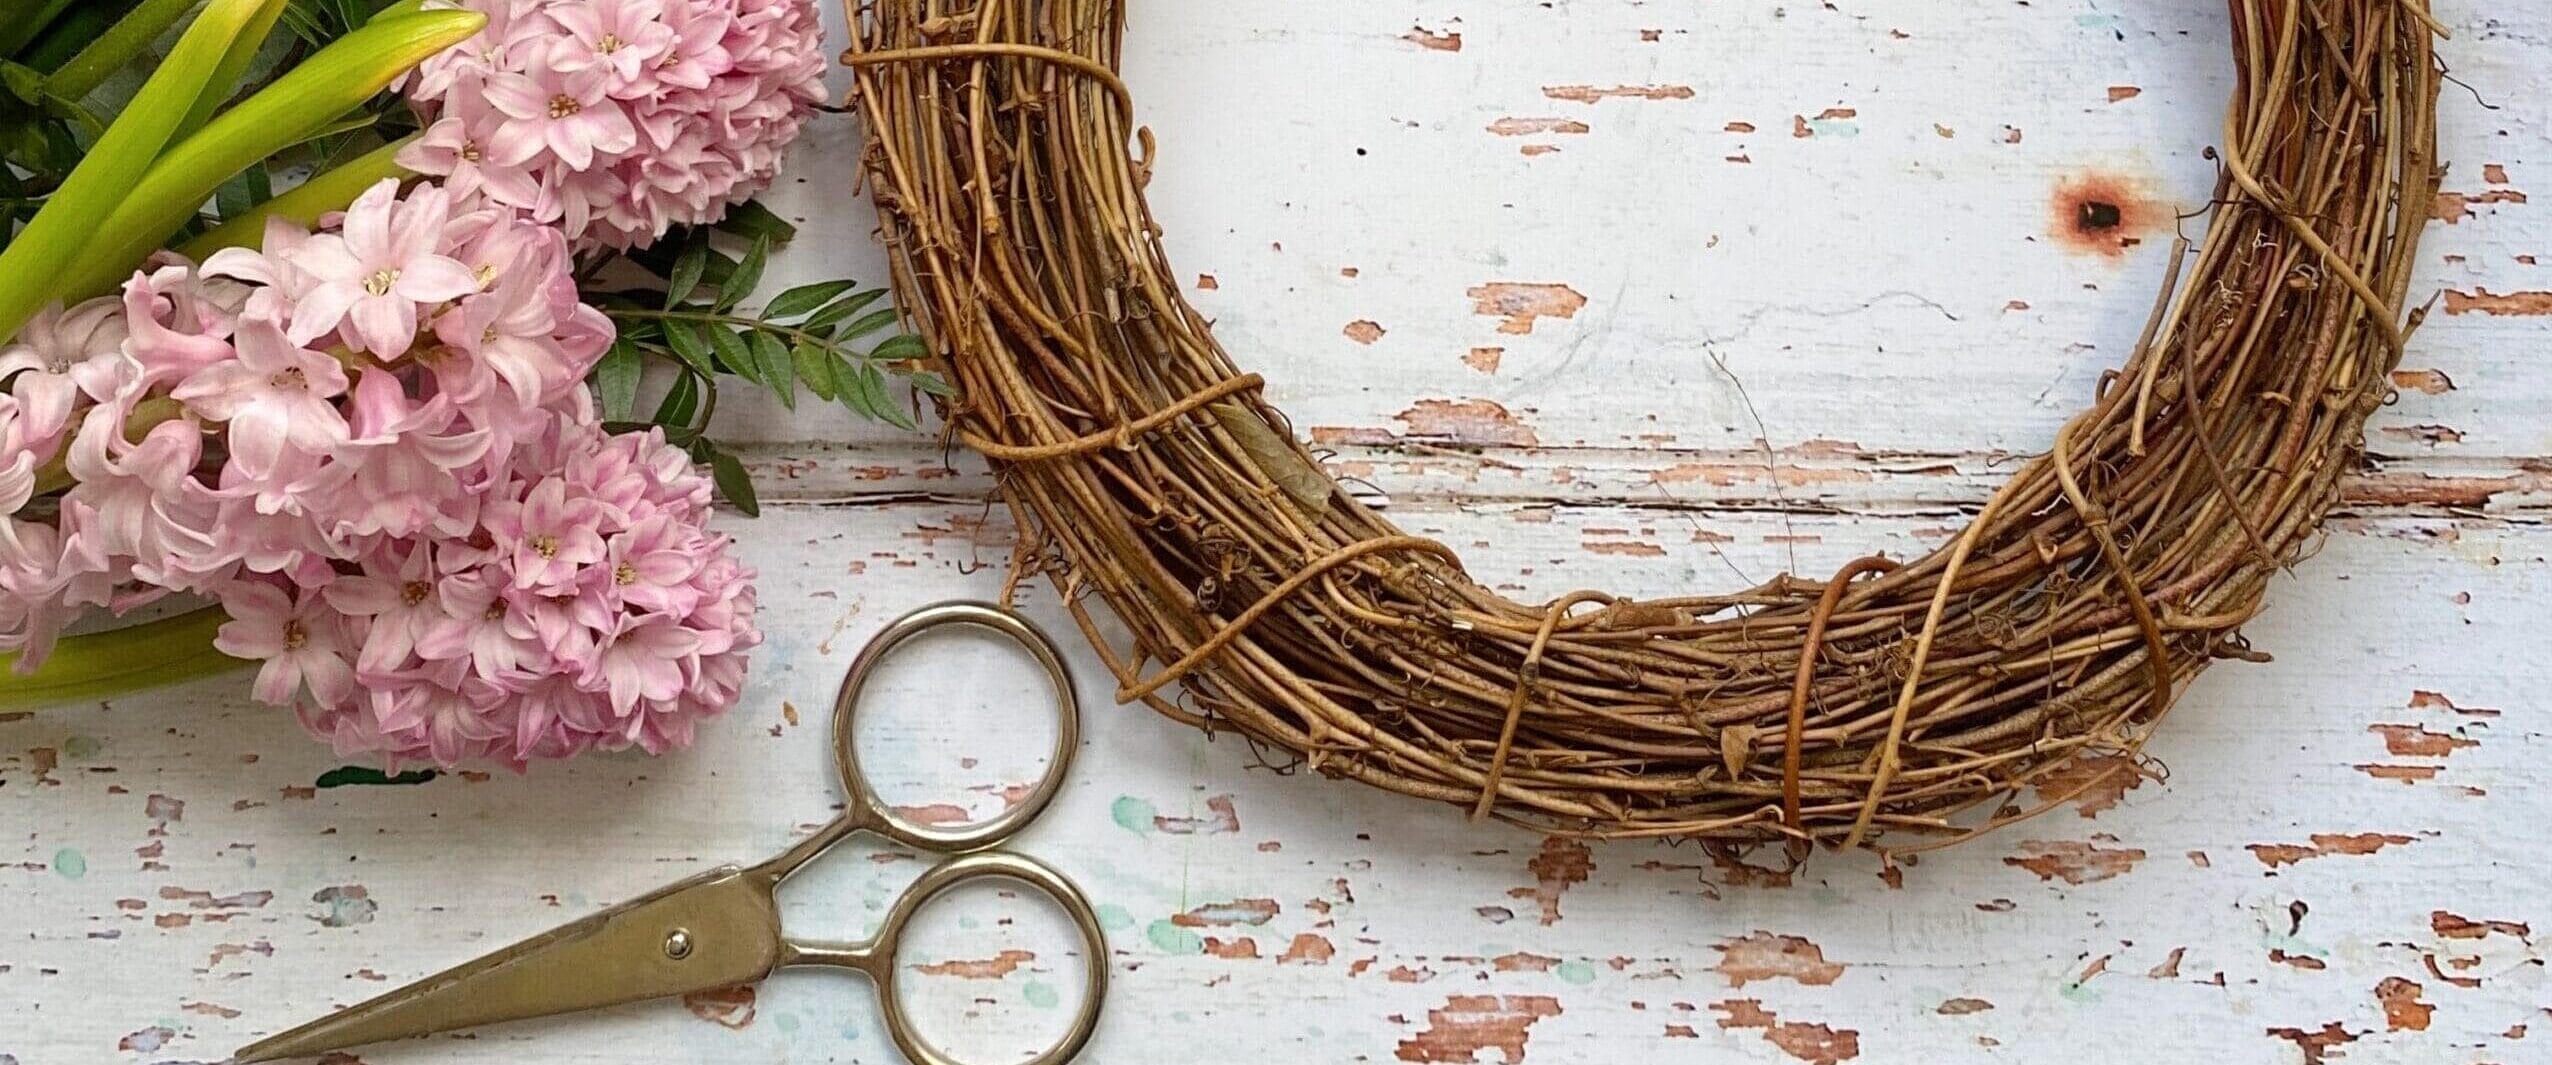
FRESH SPRING WREATH
You will need:
Rattan grapevine wreath 30.5cm
Side cutter pliers
Light pink satin ribbon 20mm x 15m
Metallic wire measuring 0.5mm x 25m
Scissors (all available from Hobbycraft)
Plus, a selection of spring flowers and green foliage (shop-bought or foraged)
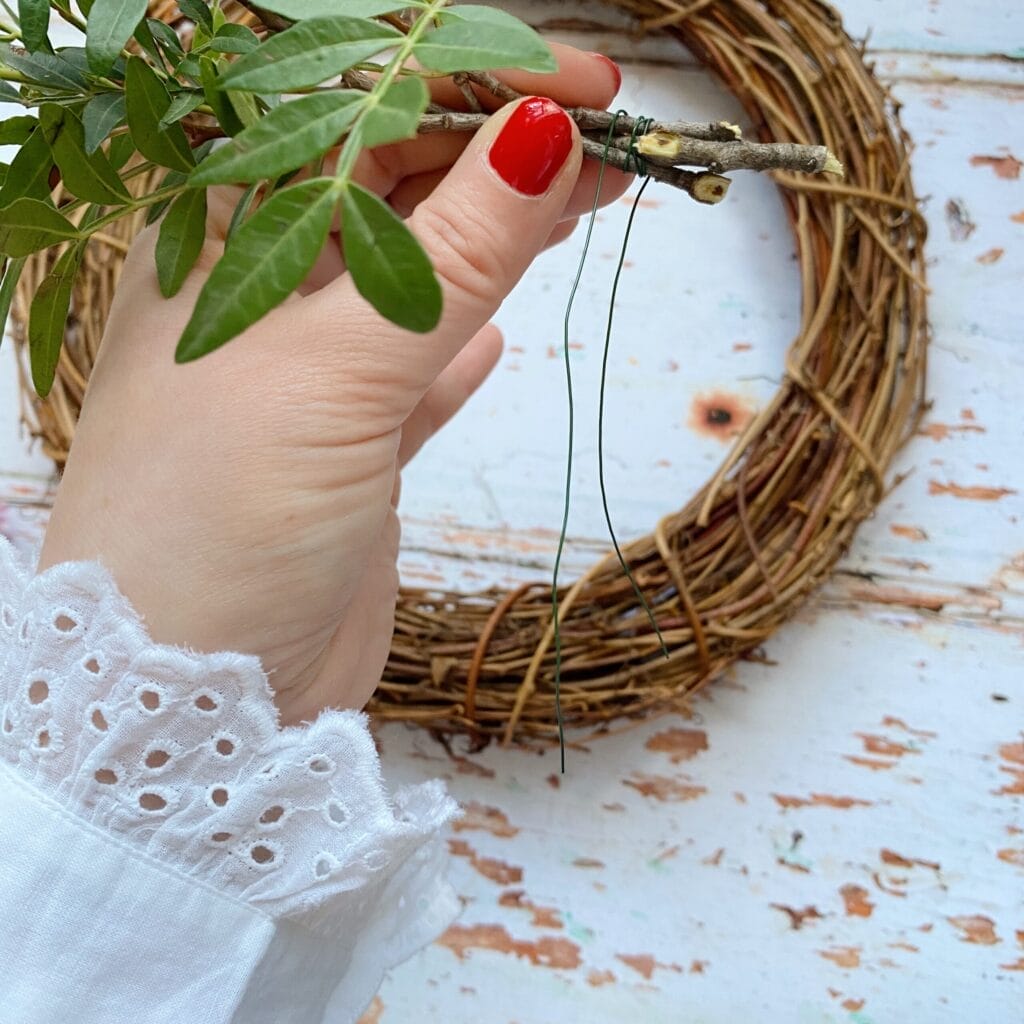
Step one
Begin grouping together green leaf foliage to create mini-bunches, tie wire around them to secure. Make sure you leave lengths of wire on the mini bunches ready to attach them on to your rattan base.

Step two
Secure foliage on to the rattan wreath with the wire, working your leaves around in the same direction. Cover around half the base. You can use this same technique to create a full wreath, just carry on working your foliage around the circle.

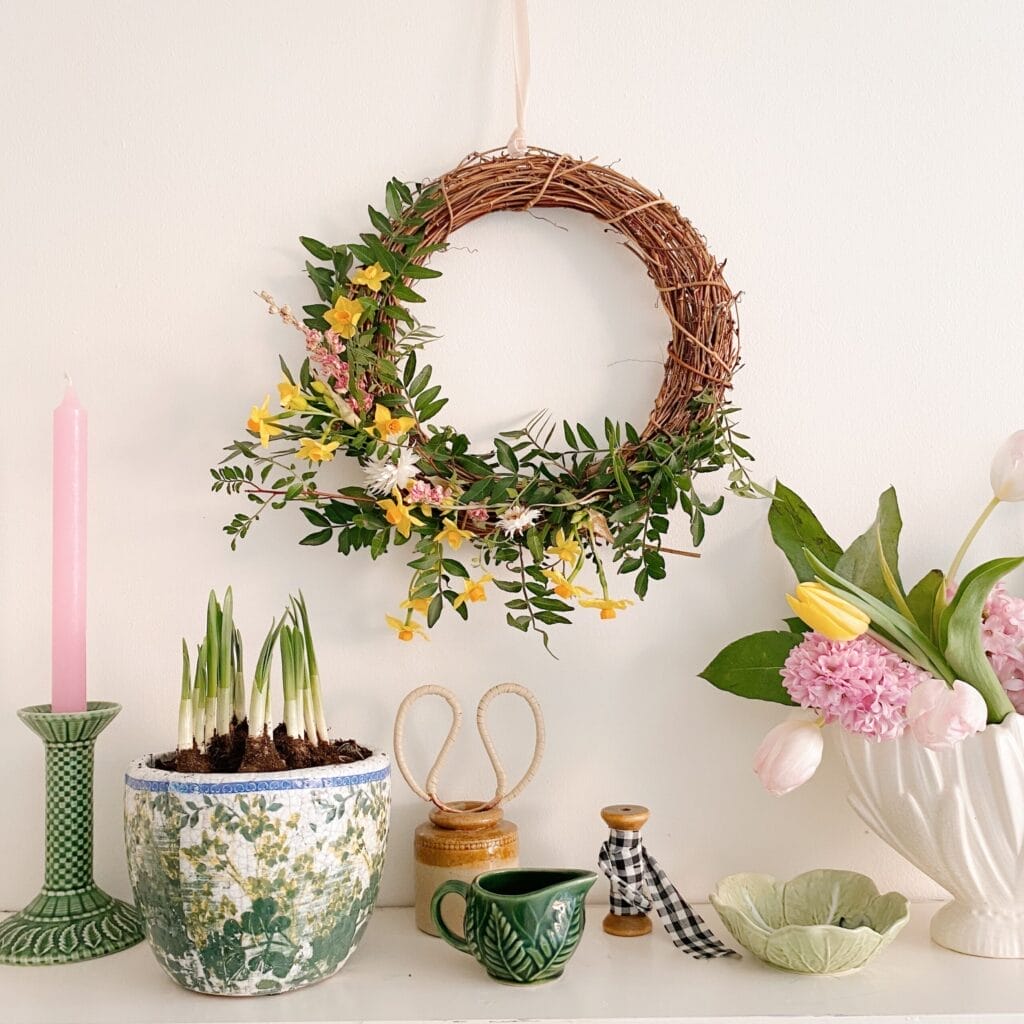
Step three
For the spring flowers, create a doubled-up length of wire the same size as the stem and then place up the stem so the wire is concealed. Use the wire to create the direction of the flowers as you place them on to the wreath base.

Step four
Secure your flowers on to your green foliage base using the rattan to help you secure your wire ends. Keep your wreath looking balanced by holding it up now and again to check how it looks as you attach your florals.

Step five
Keep building on your foliage base until you are happy with how your wreath is looking. If you like a wilder, whimsical style, weave the florals around the base. Once you’re happy with the look, add a ribbon at the top and hang in pride of place!
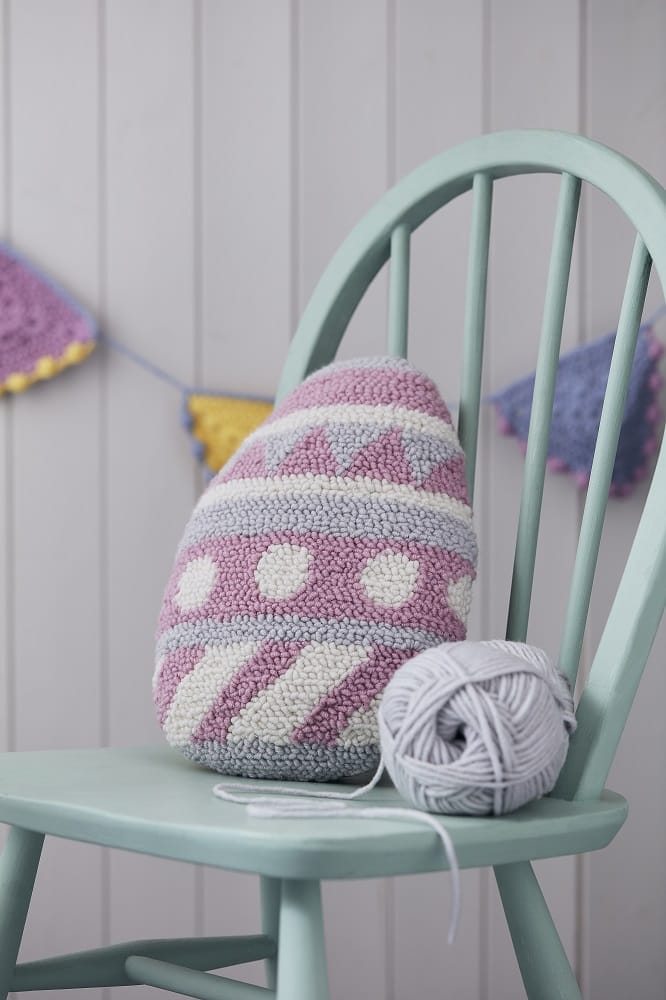
PUNCH NEEDLE EASTER CUSHION
CLICK HERE FOR YOUR FREE TEMPLATE
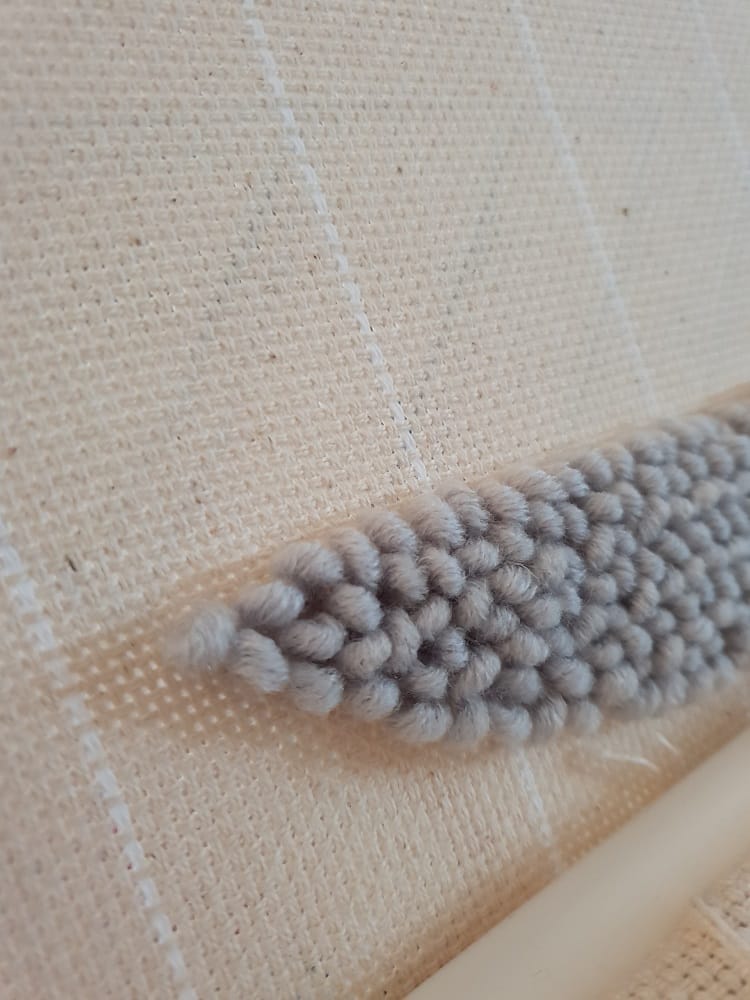
Similar to rug hooking, in needle punching you push the yarn into the fabric while keeping the needle on the surface to create textured loops resulting in a strong, textured 3D effect. Ideal for novice crafters, it takes a bit of practice to find your rhythm, but once you’ve mastered it you can cover a large surface of fabric in no time.
You will need:
Adjustable punch needle 5mm
Cream, pale grey and dusky pink soft and chunky yarn, 100g each
Soft toy polyester filing, 200g
Cream cotton Binca 9
Count needlecraft fabric 70cm x 80cm
Linen fabric
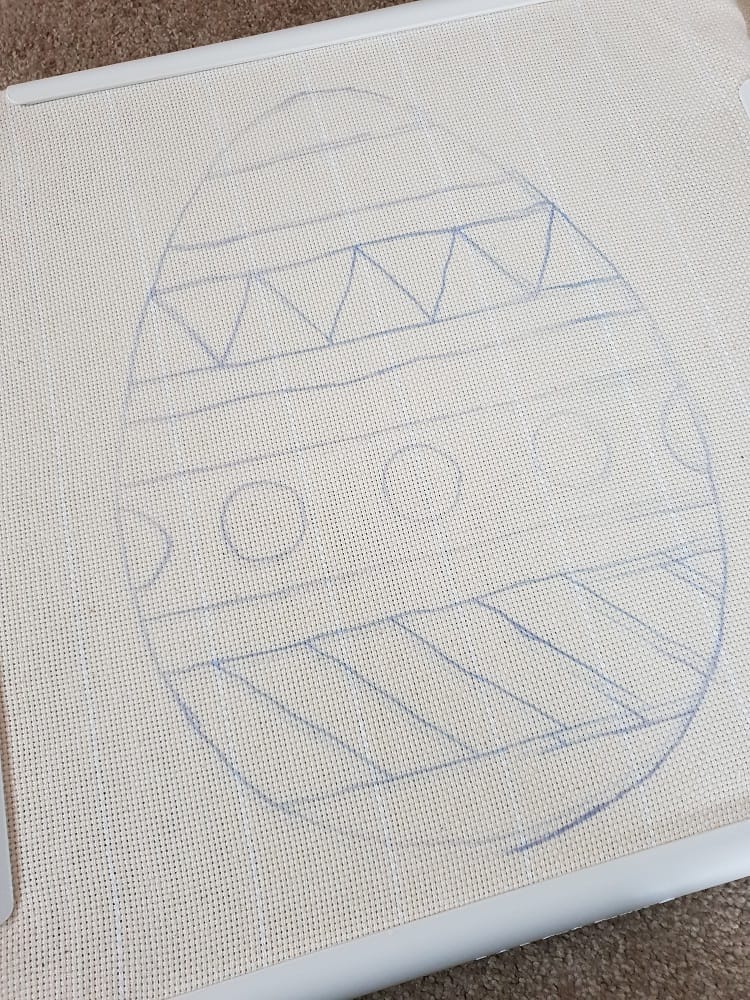
Step one
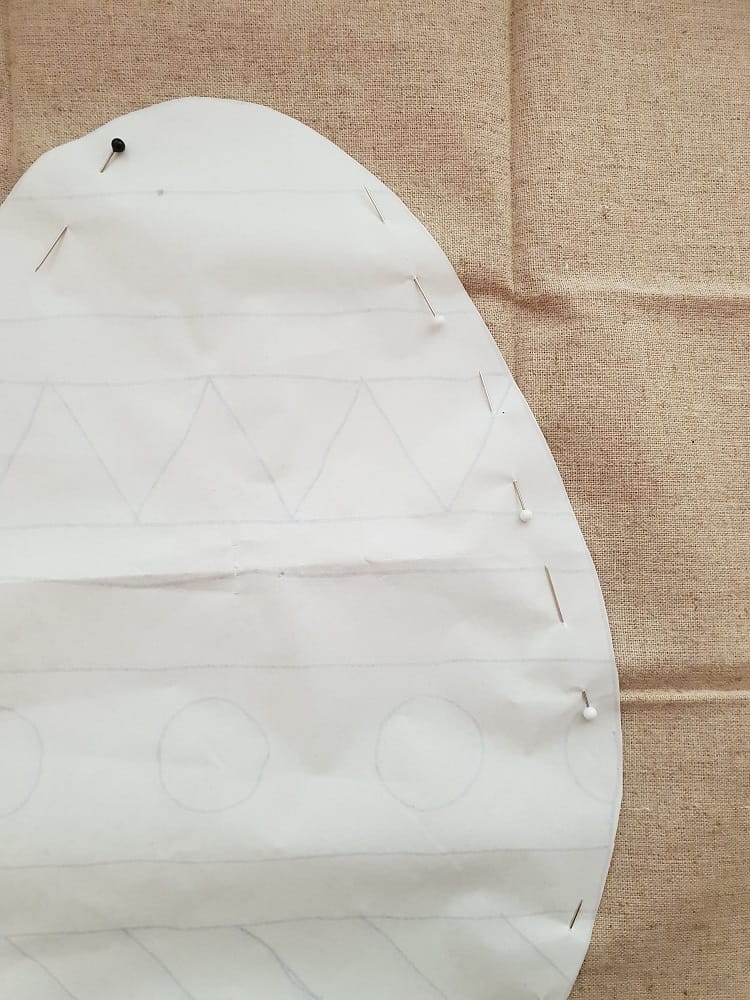
Print out the template (click here) on to A3 paper. Using a window or a lightbox, trace the template on to fabric using washable pen or pencil. This will be the back of the fabric.
Step two
Place your fabric onto an embroidery frame and make sure it is as secure and stretched as possible.
Thread your punch needle and begin by working the outside edge of the first section. Keep your stitches as even as possible, making them about 5mm long.
Once the outline has been worked, continue to fill in the rest of the section.
You will be working with the wrong side of the work facing you.
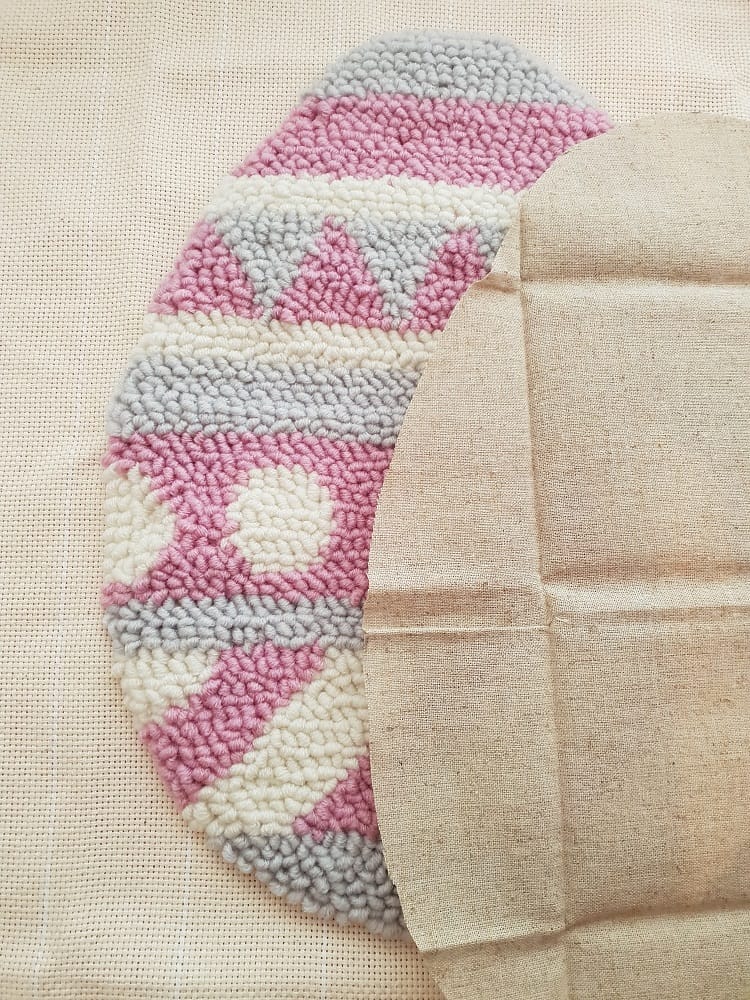
Continue to fill in each section until the cushion is complete.
Step three
Using the egg template as a guide, cut out the linen backing leaving a 3cm seam allowance.
Step four
With right-side facing in, sew around the edge of the work, leaving a gap at the bottom for the stuffing. Clip into the seam allowance to allow for a nice, neat curve around the edge of the cushion.
Step five
Turn the cushion so the right side is facing out and fill with stuffing. Fold the seam allowance in and sew the final section by hand to close.
Craft projects and products available at hobbycraft.co.uk
WOULD YOU LIKE TO ENTER OUR COMPETITIONS?
Giveaways are only available to our Candis members so why not join today!
BECOME A MEMBER